Overview
This plugin allows you to choose specific tests you want to run.
Plugin Information |
|---|
View Tests Selector on the plugin site for more information. |
User guide
Enabling The Plugin In Your Job
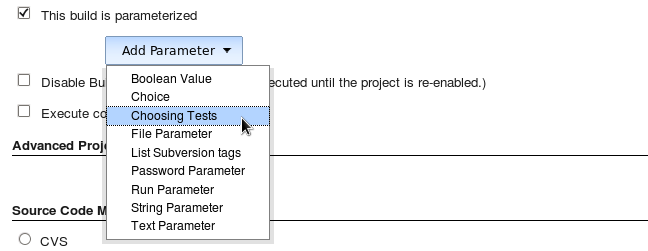
- Navigate to the Job configuration page.
- Choose the checkbox This build is parameterized.
- Click on Add Parameter drop-down list.
- Select Choosing Tests.
Screenshot
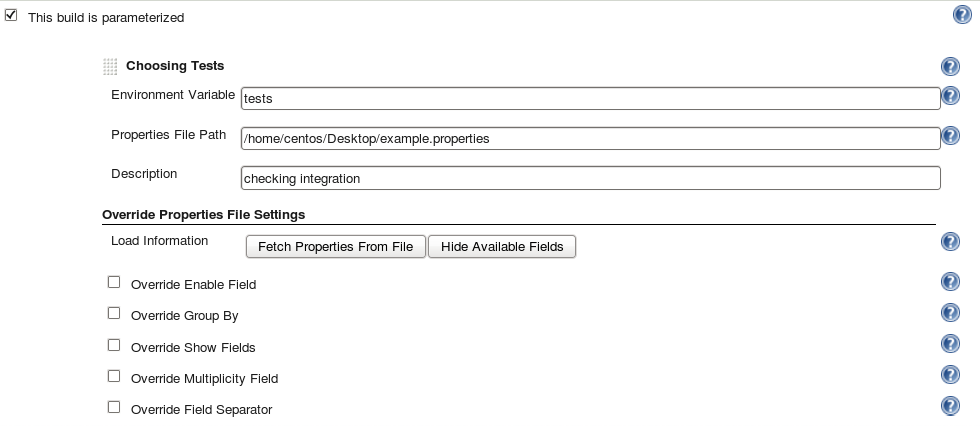
Filling The Parameters
- Specify the name of the environment variable in which you want your selected tests to be saved in.
After build the selected tests will be in this environment variable as a JSON array. - Enter the properties file path (see more information bellow).
- Add a description (optional).
About The Properties File
This file will contain all your tests and (maybe) some extra fields for the plugin.
Your properties file MUST have a property called tests.
The tests property value is a JSON array that contains a JSON object for each test.
In each test object you need to specify it's attributes by a key/value pairs.
The following properties will allow you to select specific fields which have a special meaning:
enableField |
The name of the field that will imply if the test is enabled or not. |
|---|---|
groupBy |
The field that the plugin will group the tests by. |
showFields |
The field(s) that will be shown in the tests tree. |
multiplicityField |
The field that will be set to the amount of times the test should run. |
fieldSeparator |
The character that will separate between the fields in the tests tree. |
All fields are case-sensitive.
Each property must be defined either in the properties file OR in the override section.
If you want to change the properties you defined in the file, you can override them in the override section.
This is an example for a properties file which contains all above properties:
tests=[{"enabled":true,"owner":"shushu","testgroup":"A","testcase":"single"},{"enabled":false,"owner":"shushu","testgroup":"B","setuptype":"basic"}]
enableField=enabled
groupBy=testgroup
fieldSeparator=.
showFields=testsuite,testcase
multiplicityField=multiplicity
Screenshot
Override Section
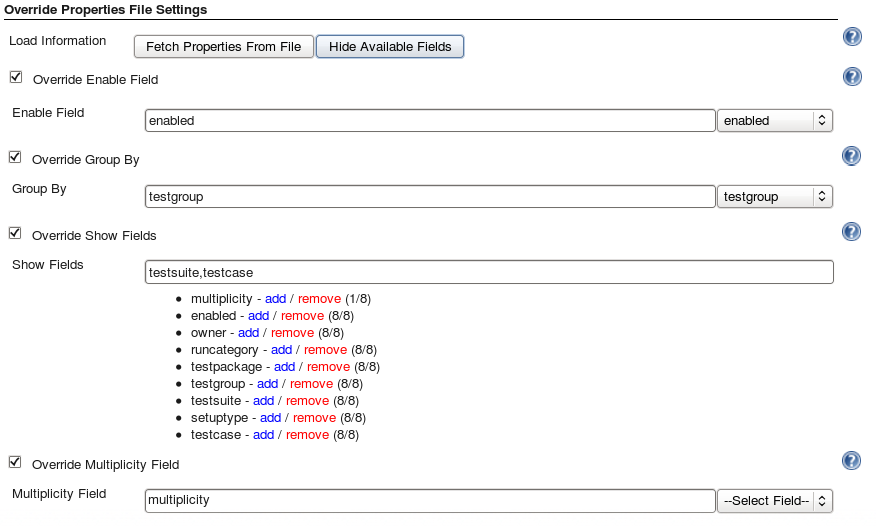
In this section you can override the properties you defined in the properties file or define them for the first time.
If you want the override to be done you must check the appropriate checkbox.
If you click on the Fetch properties From File button it will fill the properties bellow from the properties file above.
Screenshot
If you click on the Show/Hide Available Fields button it will show/hide all the fields used in the tests you defined in the properties file.
In Show Fields section, Next to each Available field appears (howManyTestsHasThisField/amountOfTests).
Multiplicity Field can exist in some (all) of the tests.
Screenshot
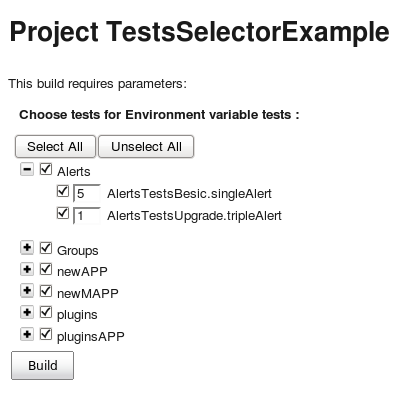
After clicking on Build Now button you will need to choose the tests (organized as a tree).
For each test you chose, you will need to fill the amount of times you want it to run.
Screenshot
Clicking on Build button will continue the build with the tests as your parameter (in the environment variable you chose).


