System Installed: Install/Extract ZAP
- Download ZAP
- Determine path
- Determine where to keep ZAP, in my case ZAP is located in
C:\Development\OWASP\Zed Attack Proxy\2.6.0\
- Determine where to keep ZAP, in my case ZAP is located in
System Installed: Environment Variable
Setup your
%ZAPROXY_HOME%Environment VariableInfo: Remember to add
%ZAPROXY_HOME%to your%PATH%.Setup your
%ZAPROXY_SETTINGS%Environment VariableInfo: Remember to add
%to yourZAPROXY_SETTINGS%%PATH%.Notice: Remember that if you're using a weekly release,
%will have aZAPROXY_SETTINGS%_D
System Installed: .bat Modification
Info: Ensure correct .jar is used.
- Add
%ZAPROXY_HOME% Add
double quotesRequired: The double quotes are mandatory if
%ZAPROXY_HOME%has spaces. Otherwise it's an optional addition.- Increase allocated RAM
System Installed: Shortcut (Optional)
Desktop shortcut
Create a shortcut to %COMSPEC% /k cd %HOMEDRIVE%%HOMEPATH% && "%ZAPROXY_HOME%\zap.bat" -installdir "%ZAPROXY_HOME%" .
Required: Name the Shortcut Zed Attack Proxy. Once created:
- Right click on it and open properties
- Go to Shortcut tab
- Click on Advanced...
- Select Run as administrator
- Save your changes
Info: If this works then it should also work from Jenkins.
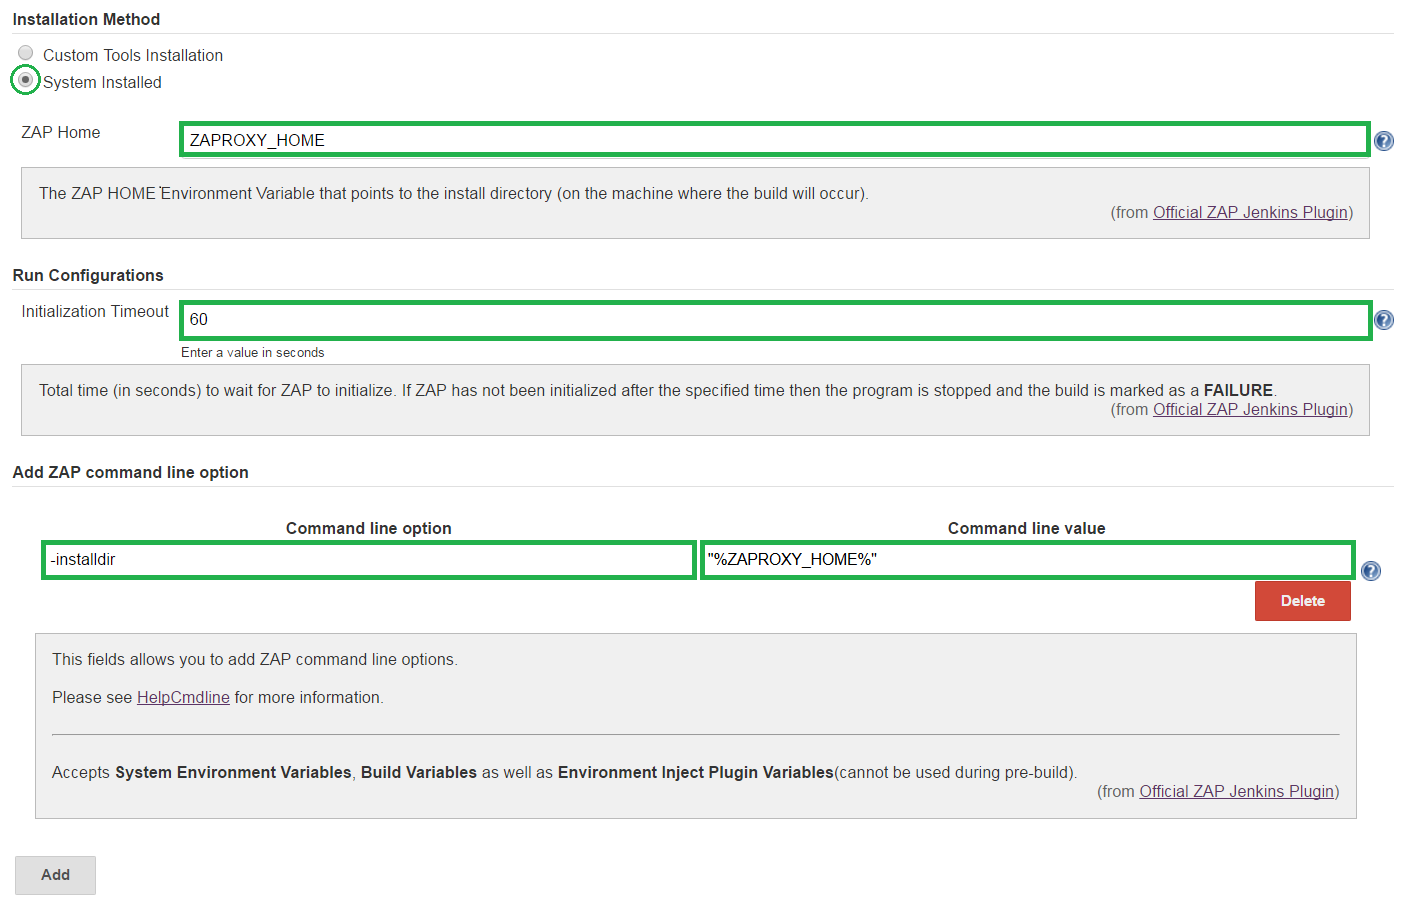
System Installed: Job Configuration
- Select System Installed
- Specify ZAP Home
- Specify Initialization Timeout
- Add ZAP command line options
Please see HelpCmdline for more information.
Notice: Adding ZAP command line options can interfere with other UI option of the plugin. USE WITH CAUTION.
Notice: The only required command line option is
installdiras indicated above. If%ZAPROXY_HOME%contains spaces in the path, remember to use double quotes as indicated in the illustration above.


