Audience: Jenkins developers who use Eclipse as their IDE
Goal: To be able to modify Jenkins core source code, and run/debug it within Tomcat.
Author: Brian Westrich (bw@mcwest.com)
Prerequisites: You have already completed the steps currently at Building Jenkins, up to and including running "mvn ... eclipse:eclipse".
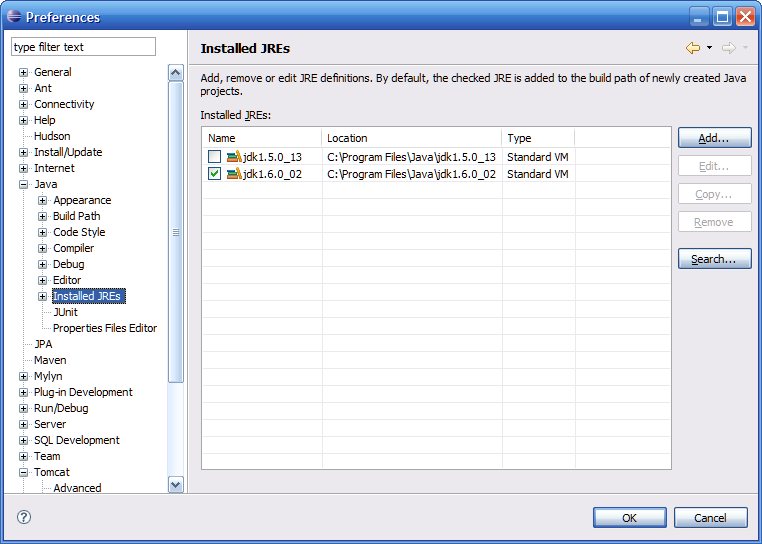
Make sure you're using Java 7 or above
Select Window > Preferences... 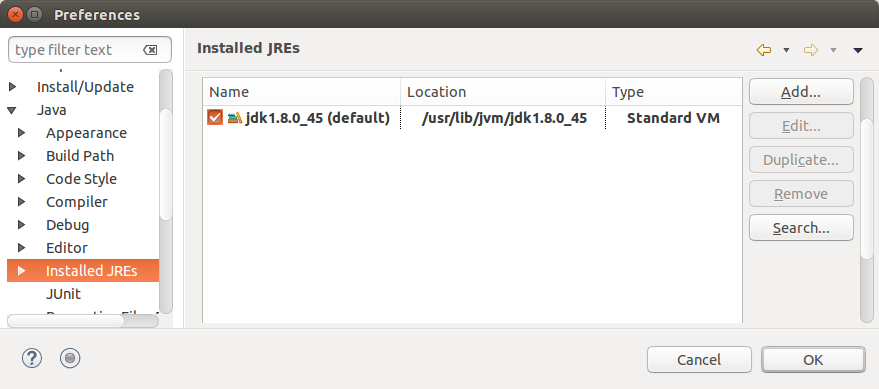
Make sure JDK7 or above is present and checked.
Set your M2_REPO variable
Select Window > Preferences...

Click New, then specify your M2_REPO location, for example:
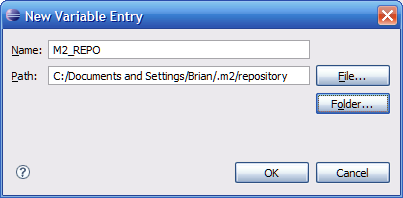
On UNIX platforms, the path will be in your home directory, for example /home/brian/.m2/repository.
Import the modules you want to work with
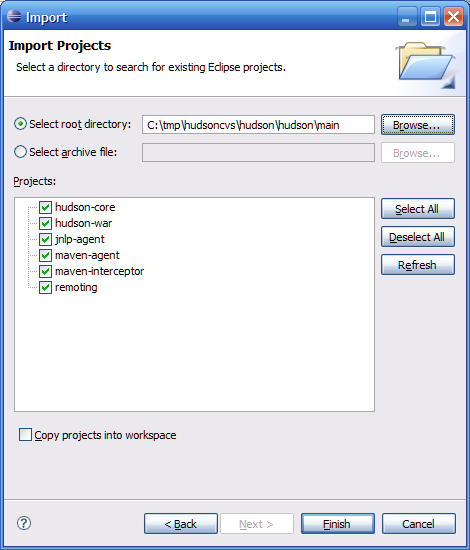
In File > Import, select General > Existing projects into Workspace, and then click on Next. The Import Project form appears. In Select root directory, enter the path to your Eclipse workspace. Type <tab> and Import Projects will recursively search for projects to import, and display them:
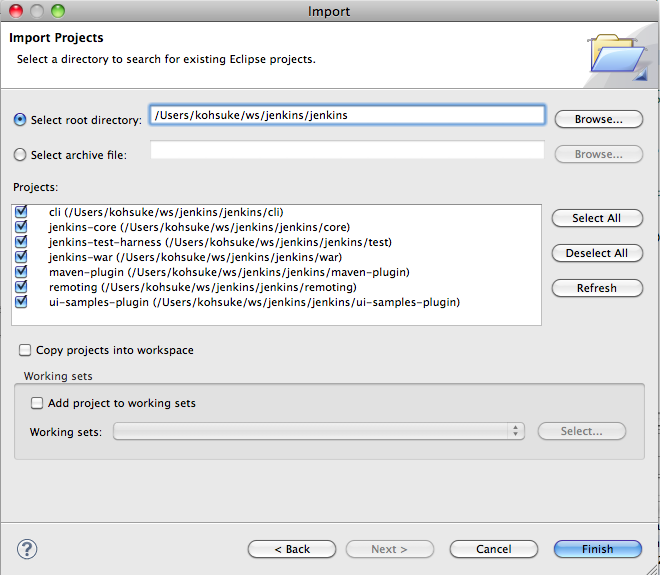
Click Finish to import the selected Jenkins projects into Eclipse.
Even if you are modifying just one module, you must import all of them into Eclipse as they depend on each other.
Other tips
Setting up Jenkins to run as web app within tomcat/eclipse (using eclipse 3.3, tomcat 6.0, sysdeo tomcat plugin):
- Add the plugin project you are currently working on into Tomcat's classpath using the Sysdeo plugin (Preferences, Tomcat, Advanced, ...)

- Download a recent stable Jenkins war.
- Copy war to tomcat webapps.
- Start tomcat. This will explode the war into the tomcat webapps directory (needed for subsequent step).
- Limitation: This setup does not deploy any non-Java artifacts to the web application. If you update any of these (e.g. html files), you'll need to manually copy these to the exploded directories in the tomcat webapps directory.
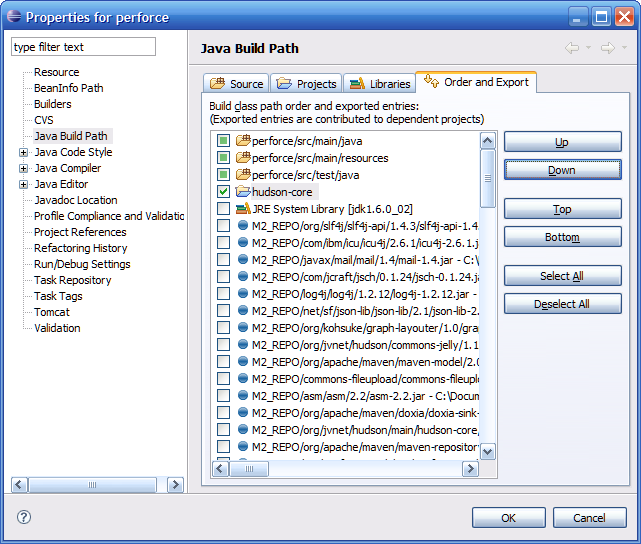
If you are changing multiple modules, the most reliable way to have the correct version appear first on the tomcat classpath is to add the imported version of the module to the classpath of the plugin you're debugging, then only add the plugin project to Tomcat's classpath. For example, this shows the Jenkins-core project added to the build path of the perforce plugin.
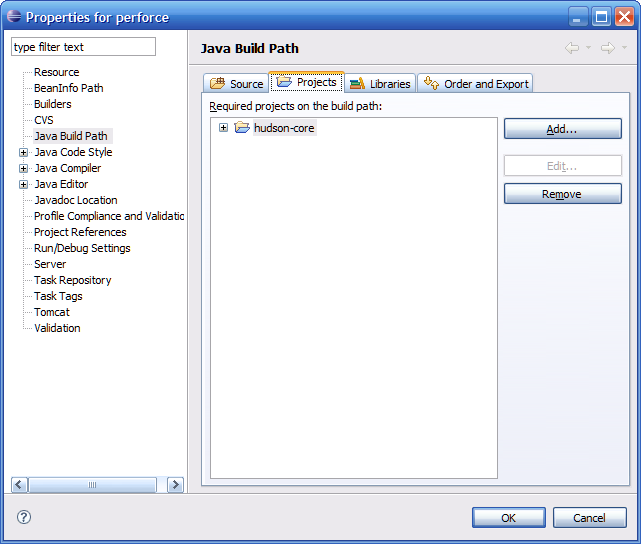
After you add the jenkins-core project to the classpath, use the 'Order and Export' tab to move the jenkins-core project before the jar version (in M2_REPO) of jenkins-core. Also, you must check the checkbox to the left of jenkins-core, otherwise Tomcat will not be able to load any of the classes in jenkins-core.
Use Mylyn and the Jenkins issue tracker
It is possible to configure Mylyn so it will connect to the Jenkins issue tracker. To be able to connect to the tracker you need to install the CollabNet Desktop plugin.
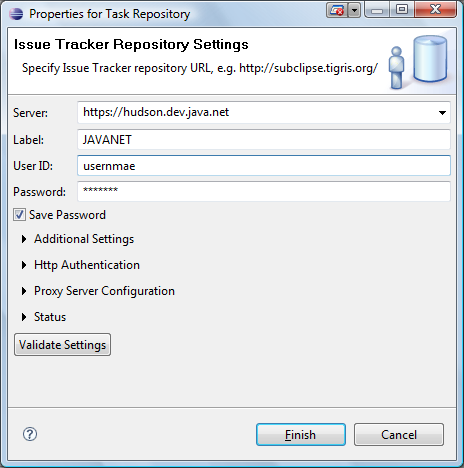
Task repository
When the plugin has been installed, create a new Task repository with the following settings:
Task query
To create a query to the issue tracker
- Create a new Mylyn query
- Select the newly create task repository
- Select "Create query using form"
- Enter a name for the query
- Set the component to Jenkins
- Configure the query
 !
!