Plugin Information |
|---|
View IBM Security AppScan Source Scanner on the plugin site for more information. |
Project Description
This plugin is supported by Aspect Security.
The purpose of this plugin is to allow Jenkins to perform static code analysis (SCA/SAST) with IBM AppScan Source for Analysis with minimal configuration. AppScan Source for Analysis is a security tool provided by IBM that will scan application source code for vulnerabilities. Configuring AppScan Source to perform automated scanning with custom batch jobs or shell scripts can be a time-consuming and error-prone process. This Jenkins plugin greatly simplifies the process of automating AppScan Source by providing global settings and simple scan configuration within Jenkins.For more information on IBM AppScan Source, please visit the official IBM site http://www-03.ibm.com/software/products/en/appscan-source
Prerequisites
This plugin requires the following:
- A valid license for AppScan Source for Analysis and AppScan Source for Automation
Note: The automation license is required to unlock the command-line interface (cli) functionality - AppScan Source for Analysis must be installed on the same server as Jenkins
- The AppScan Source project or application files for the application(s) you are scanning (.PAF, .PPF, etc)
- Application source code and dependencies must already be referenced in the AppScan Source project or application files
Plugin Setup
Before using this plugin, a login token must be generated via the AppScanSrcCLI application. To generate a login token:
- Open a command prompt
- Navigate to the bin folder in your AppScan Source install folder
- Ex: cd c:\program files(x86)\IBM\AppScan Source\bin
- Execute the AppScan Source CLI login command
- AppScanSrcCli.exe login http://hostname:9443/ase username password -persist -acceptssl
- Be sure to replace hostname, username, and password with valid values for your installation
- This will create a file called ouncecli.token under c:\users{username}\.ounce\. Verify that this file exists and make note of the location
For additional reading on the login command, please see IBM's documentation: http://www-01.ibm.com/support/knowledgecenter/SSS9LM_9.0.3/com.ibm.rational.appscansrc.utilities.doc/topics/command_line_interface_commands_login.html
Plugin Configuration
- From the Jenkins homepage, click Manage Jenkins and then Configure System
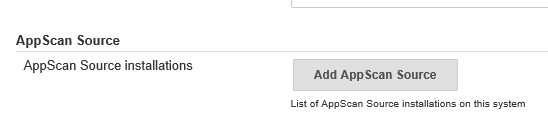
- Scroll down the page and locate the section titled AppScan Source

- Click Add AppScan Source
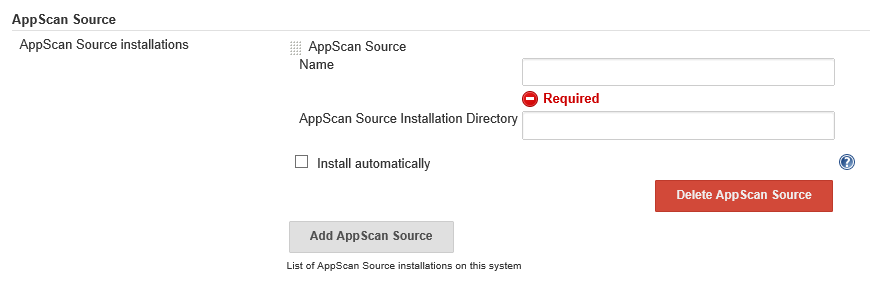
- Fill out the AppScan Source form
 \
\
- AppScan Source Name: A name for this instance of AppScan Source. This is just to help manage environments that may have multiple installations
- AppScan Source Installation Directory: The path to the installation directory. Note: the default value is C:\Program Files (x86)\IBM\AppScanSource
- Scroll to the bottom and locate the section titled AppScan Source Configuration and fill out the form
 \
\
- AppScan Enterprise Hostname/Domain Name: The host name of your AppScan Enterprise server
- Login Token File Path: This is the path to the login token generated above. Default path is C:\Users{user}\.ounce\ouncecli.token
- Click Save
Using the plugin
- Create a new job or access an existing job
- Select "Configure"
- Select "Add build step" and select "Run AppScan Source"
- Complete the fields that appear:
- AppScan Source installation will show the name you provided for the installation on the global configuration screen. If you have not added an installation, please go the the Jenkins Configure System link under Manage Jenkins. If you only have one installation configured, the installation should be selected for you. If you plan to execute AppScan Source on multiple Jenkins nodes, you may need to configure multiple installation paths.
- Disable scan should be unchecked if you wish the scan to run
- Accept SSL Errors should be checked if you have not created a trusted certificate for your AppScan Source installation. In an Enterprise environment, this should not be checked, since you should be using a trusted certificate.
- Scan Workspace Directory is where scan artifacts, like WAFL and staging files will be placed. Scan results (.ozasmt file) will also be placed in this directory.
- Application file should point to a PAF or SLN file to scan.
- Click Save at the bottom
- Run the job.
Compatibility
This version of the plugin was tested with Jenkins 1.651.1 and IBM Security AppScan Source 9.0.3. Plugin should work with any version of AppScan Source 9.0.0 or newer.
Roadmap
Support automated publishing of scan results to AppScan Enterprise.
Execute application scans with IBM Security AppScan Source
For additional information about this plugin, please see the project's README on GitHub