This plugin integrates Jenkins to Backlog. Backlog is an issue tracking system provided by Nulab.
This plugin adds a link to your Backlog Space or project to navigation menu on left side of Job page.

In the "Changes" section, this plugin converts issue notation of Backlog (like BLG-123, shown in the following example) found in your commit message to link for an issue on your Backlog space.
Fixed Bug [[BLG-123]]
Fixed Another Bug ( BLG-123 )
This plugin adds changeset / diff links to "Summary" section on "Changes" page. (now supporting Subversion and Git SCM)

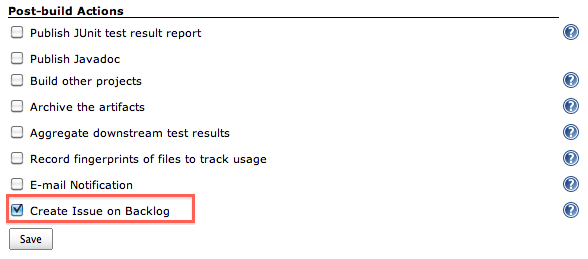
This plugin creates an issue on Backlog when build fails or becomes unstable.

This plugin publishes build artifacts to Backlog File which is shared storage for Backlog users.

Refer to the following blog entries for more details.
- For English readers, How to transfer artifacts built on Jenkins to Backlog
- For Japanese readers, Jenkinsで生成したファイルをBacklogのファイル共有に転送する
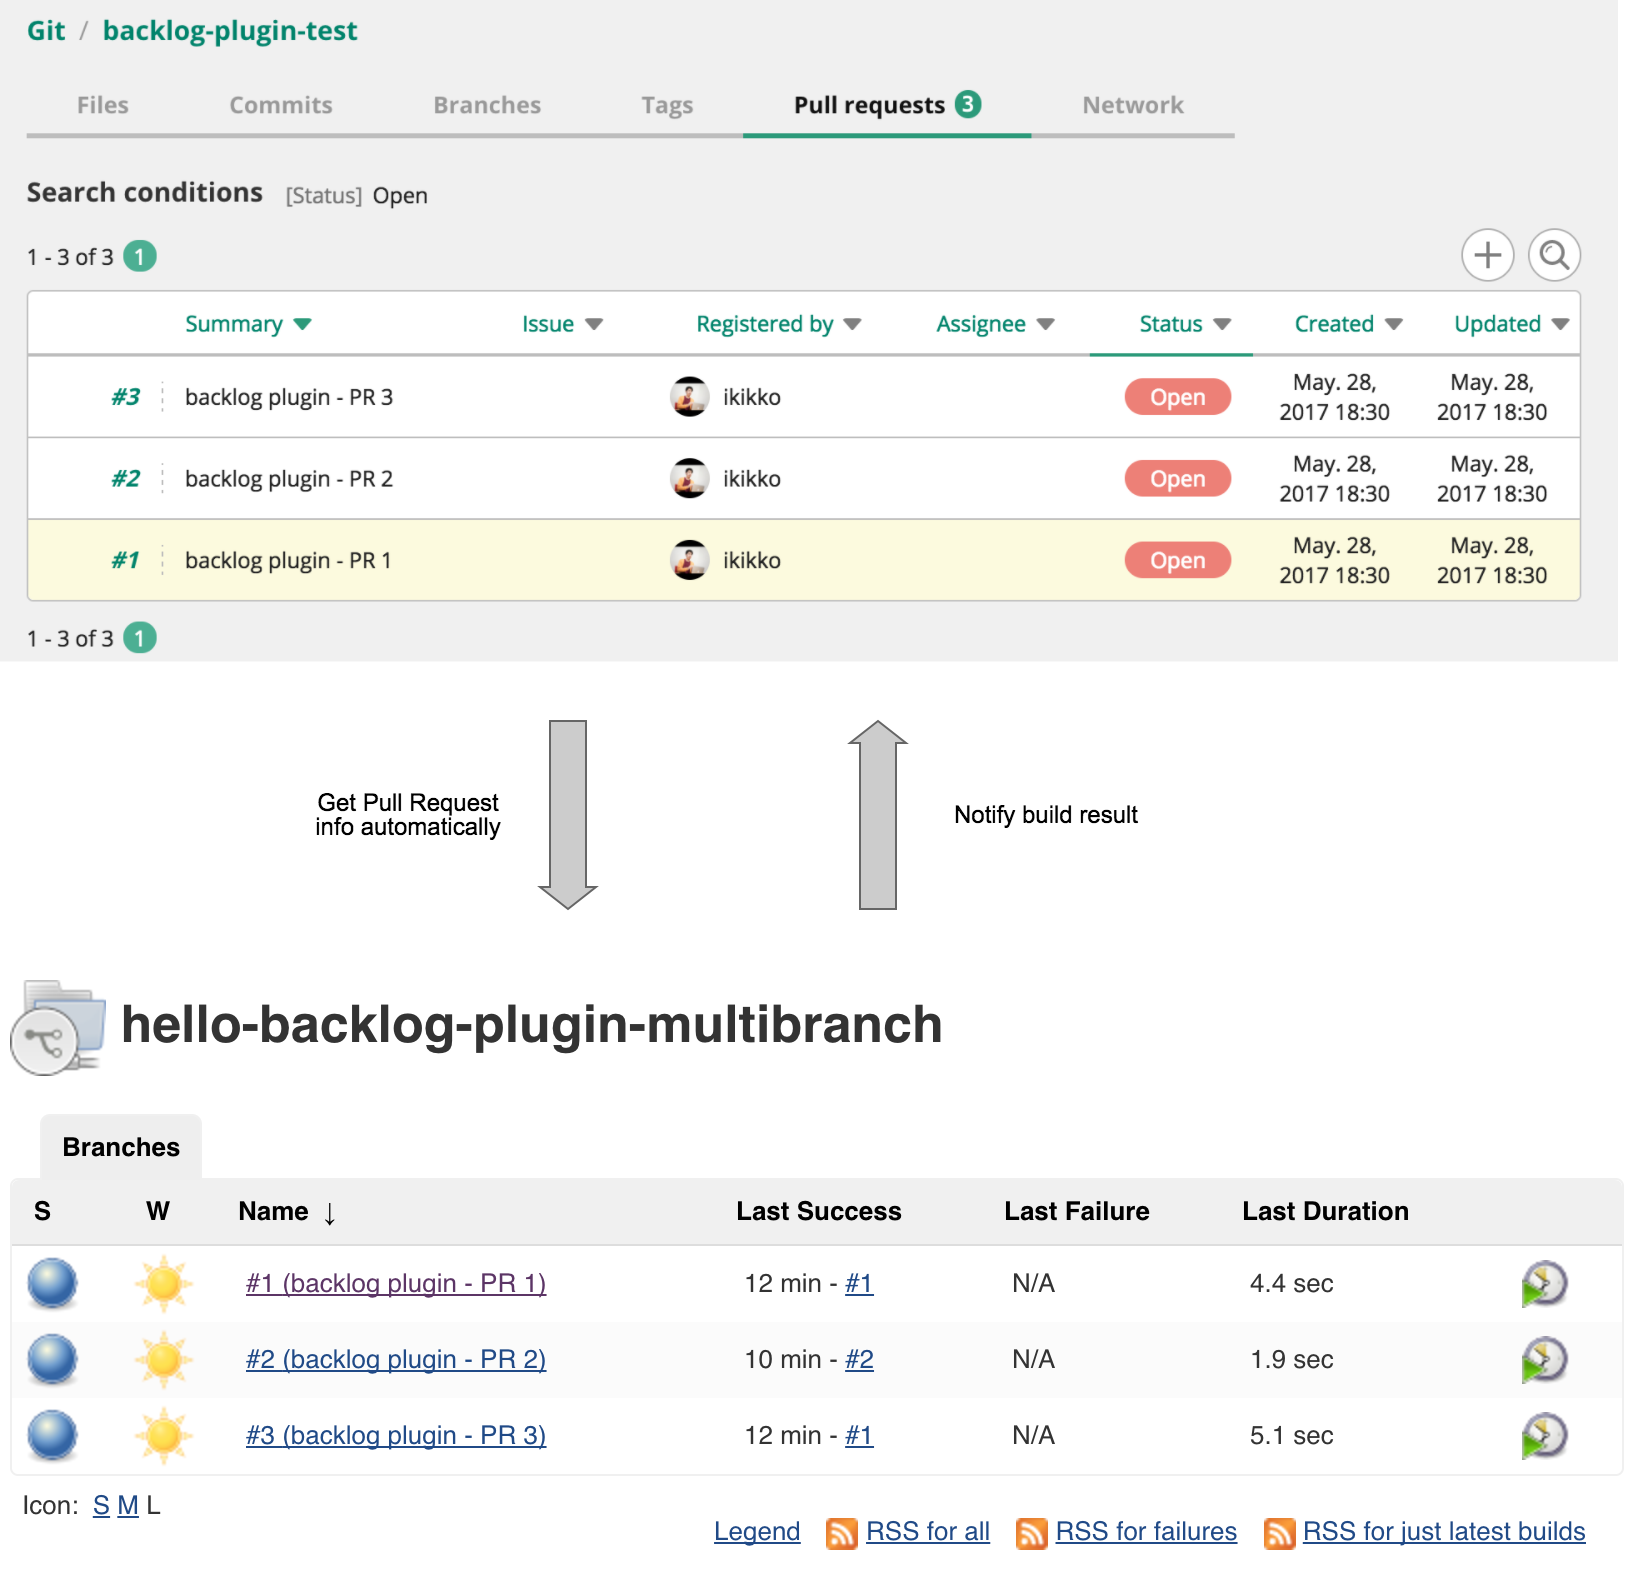
This plugin notifies a build result to Backlog pull request. Refer to the following blog entries.
- For Japanese readers, Jenkins Backlog Pluginで、ビルド結果をプルリクエストに通知!
This plugin support multibranch for Backlog pull request ( like GitHub Branch Source Plugin ). You can see each pipeline according to each pull request.
Refer to the following blog entries for more details.
- For Japanese readers, Jenkins Backlog Plugin in Pipeline – 自動でプルリクのジョブを作っちゃうんだ♪ –
This plugin enables you to login to your Jenkins through authentication by Backlog user.
- Navigate to the Configuration page for your job.
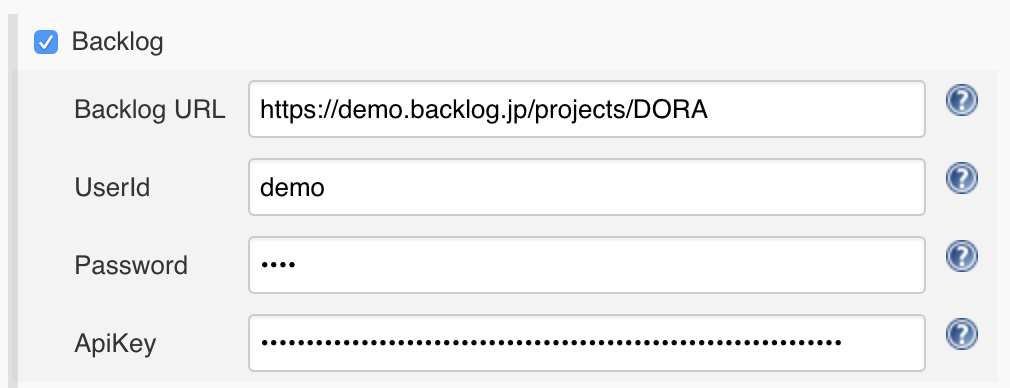
- In the top section, you can find setting for "Backlog".
- "Backlog URL" : enter URL of your Backlog Space ( eg. https://demo.backlogtool.com or https://demo.backlog.jp/ ) or Backlog project ( eg. https://demo.backlogtool.com/projects/DORA or https://demo.backlog.jp/projects/DORA ).
- "User ID" / "Password / API key" : enter User ID, Password or API key. They are used to connect Backlog API in some features like creating an issue when build fails.
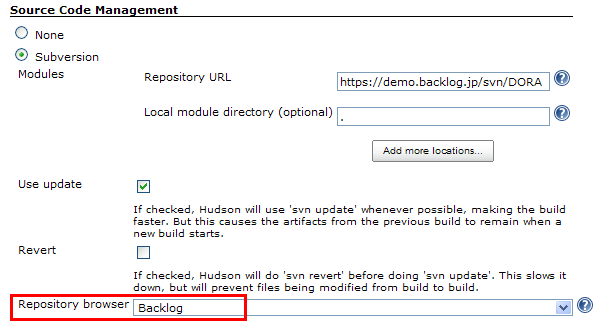
- In "Source Code Management" section, check "Subversion" or "Git", and select "Backlog" in "Repository browser" field. When you select "Git", you have to enter repository name.
When you want to select other project, click "advanced..." button and enter URL of the project explicitly. - In "Post-build Actions" section, check "Create Issue on Backlog".
- In "Post-build Actions" section, check "Publish Files to Backlog".
- "Source files" : enter build files to be published. You can use Ant glob syntax to specify files.
- "Remote directory" : enter directory name on Backlog File to save artifacts. You can use environment variables defined in Jenkins here.
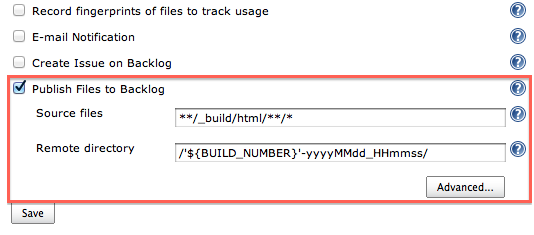
You can modify directory name to include timestamp by clicking "advanced..." option on this setting screen. For more details, refer the help available on that page.
- Save your changes.


- Navigate to the Configuration page for your Jenkins.
- In the top section, you can find the setting for "Enable security".
- In "Access Control" > "Security Realm" section, select "Backlog".
- "Backlog URL" : enter URL of your Backlog Space ( eg. https://demo.backlogtool.com/ or https://demo.backlog.jp/ ).
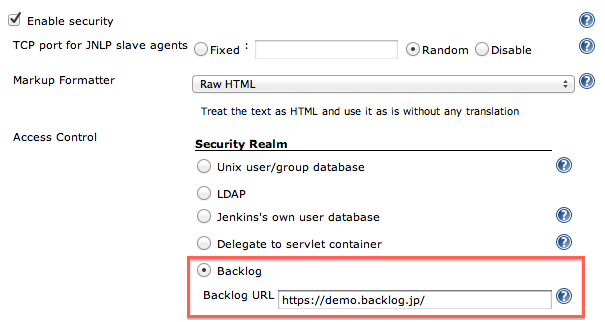
- Save your changes.

When you have an unexpected result, refer to log. Add "hudson.plugins.backlog" logger, and you can see.

See the Changelog.