


Allow Jenkins to start agents on EC2 or Eucalyptus on demand, and kill them as they get unused.
With this plugin, if Jenkins notices that your build cluster is overloaded, it'll start instances using the EC2 API and automatically connect them as Jenkins agents. When the load goes down, excess EC2 instances will be terminated. This set up allows you to maintain a small in-house cluster, then spill the spiky build/test loads into EC2 or another EC2 compatible cloud.
First, go to EC2 and sign up for the service. Once you've installed the plugin, you navigate to the main "Manage Jenkins" > "Configure System" page, and scroll down near the bottom to the "Cloud" section. There, you click the "Add a new cloud" button, and select the "Amazon EC2" option. This will display the UI for configuring the EC2 plugin. Then enter the Access Key and Secret Access Key which act like a username/password (see IAM section). Because of the way EC2 works, you also need to have an RSA private key that the cloud has the other half for, to permit sshing into the instances that are started. Please use the AWS console or any other tool of your choice to generate the private key to interactively log in to EC2 instances.
Once you have put in your Access Key and Secret Access Key, select a region for the cloud (not shown in screenshot). You may define only one cloud for each region, and the regions offered in the UI will show only the regions that you don't already have clouds defined for them.
Use "Test Connection" button to verify that Jenkins can successfully talk to EC2. If you are using UEC you need to click on Advanced and fill out the endpoint details for your cluster.

Next, configure AMIs that you want to launch. For this, you need to find the AMI IDs for the OS of your choice. Packer is a good tool for doing that. Jenkins can work with any Unix AMIs. If using an Ubuntu EC2 or UEC AMI you need to fill out the rootCommandPrefix and remoteAdmin fields under advanced. Windows is currently somewhat supported.
Configuring labels allows Jenkins to pick the right AMI to start. For example, if all your existing agents labeled "solaris" are fully busy and you have more builds that are tied to the "solaris" label, Jenkins will start the AMIs that have the "solaris" label.
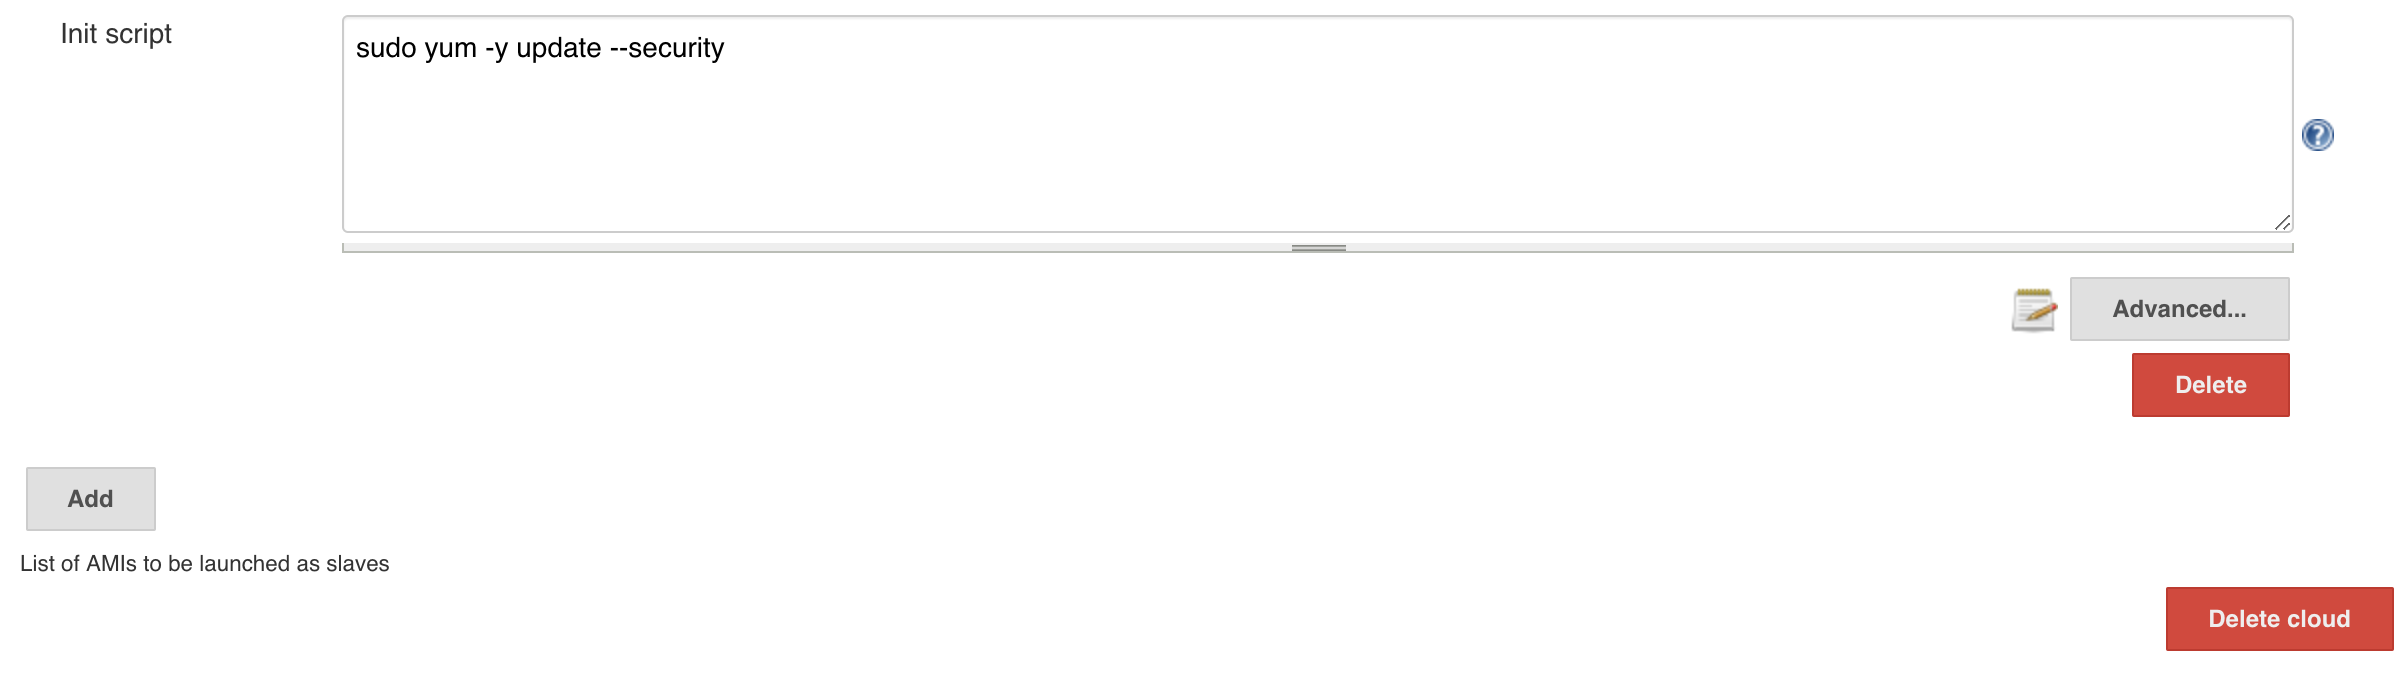
Init script is the shell script to be run on the newly launched EC2 instance, before Jenkins starts launching a agent agent. If the AMI doesn't have Java pre-installed, you can do this in the init script. This is also a good place to install additional packages that you need for your builds and tests. The init script is located at /tmp/init.sh and is owned and run by the user account specified in the "Remote User" field (so use of "sudo" may be required for non-root accounts).

Configure several AMIs if you need different OS images.
With this setting, your Jenkins will automatically start instances when the load goes up, and the instances will be terminated (or stopped - see below) automatically if it's idle for more than 30 mins.
By default, instances are terminated when the idle timeout period expires. You can change this by specifying the Stop/Disconnect on Idle Timeout flat in the Advanced properties of the AMI configuration. If this is specified, the instance is stopped when the timeout expires. If the instance is required again, then the plugin will look for a stopped instance that exactly corresponds to the AMI specification and resume it if found. Otherwise a new instance is started. Having the instances be stopped instead of terminated is useful when you are using EBS volumes and want to keep them mounted for the life of the instance and reuse the instance for long periods of time. This can greatly reduce the startup time of the instance since it does not have to build the volume from the snapshot.
Spot instances are similar to EC2 instances, except for a few key differences. They are generally more affordable, but they have the possibility of being terminated if someone has bid more on them than you have and can take longer to provision. To mitigate some of these issues, your Jenkins and Agent AMIs will need a bit of configuration to convert the Spot agents to register with Jenkins when they spawn up. Due to these changes, it may appear that a Spot agent will have failed (with a red X), but the message associated with the error will inform you if the Spot instance just has not called back yet or not. For more information on Spot instances, read the information here: http://aws.amazon.com/ec2/spot-instances/ .
To enable use of Spot as opposed to EC2 for an instance, the "Use Spot Instance" check box must be checked. Also, a bid price must be specified. If you want to determine what the current price of the instance is without going to the AWS website, pick your region and instance type (as you already should) and click "Check Current Spot Price".
To choose between a Persistent or One Time bid (to keep the bid alive until cancelled or to stop the bid after it has been fulfilled once), choose from the drop down menu.
For Jenkins, the major configuration change will be if you have a restrictive firewall, since these instances need to connect back to Jenkins. The first configuration change to Jenkins is to change your Jenkins URL option in the Configure Jenkins page to be the external URL to the server. One port that needs to be open is the one that you use to access Jenkins, the other is the JNLP port, which is generally randomly assigned. To set the JNLP port to something predictable, follow the Connection Mechanism section on this page. Jenkins CLI
In order for your EC2 instance to know that it is to be a Jenkins agent, it must be preconfigured with start up commands so that it can register itself with Jenkins. The Jenkins information is passed to the Spot agents via EC2 user-data. This information includes the name that Jenkins has given the agent, and the configured URL for the Jenkins controller node.
Sample scripts for assisting in configuring an Ubuntu-based AMI to work with the Jenkins ec2-plugin and Spot agents are included with the installation of the plugin.
Config Script:
(jenkins_server)/plugin/ec2/AMI-Scripts/ubuntu-ami-setup.sh
Startup Script:
(jenkins_server)/plugin/ec2/AMI-Scripts/ubuntu-init.py
The config script is run by the user from the EC2 instance with root access. It installs Java onto the instance, fetches the startup script and sets it to run when the machine starts up. It can be retrieved from the above URL using a command like wget, or copied over using a tool like scp.
wget (jenkins_server)/plugin/ec2/AMI-Scripts/ubuntu-ami-setup.sh
Once the scripts have been downloaded, the script can be run. Running this script will also run the ubuntu-init.py script, so there is no need to run it on its own.
sudo sh ubuntu-ami-setup.sh jenkins_server{:port}
Note: "http://" will be prefixed to the jenkins_server parameter
The config script then fetches the startup script and sets up the AMI to register itself with a Jenkins controller node when it gets started.
After setting up the image, you can save the image using Amazon’s EC2 web console. To do this, right click on your instance from the console and select “Create Image (EBS AMI)”.
In order to set up additional images using other operating systems, you can configure your own startup script based on the startup script above. This script should perform the following actions when the machine is started up:
# Verify that Java is installed

# Install Java if it is not installed

# Read user data for the EC2 instance. It is available from [http://169.254.169.254/latest/user-data]

# Values are passed in with the format of JENKINS_URL=[Jenkins_Url]&SLAVE_NAME=[Agent_Name]&USER_DATA=[other_user_data]

# Parse the values to retrieve the Jenkins_Url and Agent_Name
# Fetch the agent.jar from the Jenkins controller using wget (or something similar)

wget [Jenkins_Url]jnlpJars/agent.jar -O agent.jar
# Register the agent to the Jenkins controller node

java -jar agent.jar -jnlpUrl [Jenkins_Url]computer/ [Agent_Name] slave-agent.jnlp
It's possible to create a separate account for Jenkins using the Amazon IAM feature. Go to the IAM tab in the AWS console and create a user. Then go to the user's Permissions tab and use this policy (change username if your user is not called jenkins):
{
    "Version": "2012-10-17",
    "Statement": [
        {
            "Sid": "Stmt1312295543082",
            "Action": [
                "ec2:DescribeSpotInstanceRequests",
                "ec2:CancelSpotInstanceRequests",
                "ec2:GetConsoleOutput",
                "ec2:RequestSpotInstances",
                "ec2:RunInstances",
                "ec2:StartInstances",
                "ec2:StopInstances",
                "ec2:TerminateInstances",
                "ec2:CreateTags",
                "ec2:DeleteTags",
                "ec2:DescribeInstances",
                "ec2:DescribeInstanceTypes",
                "ec2:DescribeKeyPairs",
                "ec2:DescribeRegions",
                "ec2:DescribeImages",
                "ec2:DescribeAvailabilityZones",
                "ec2:DescribeSecurityGroups",
                "ec2:DescribeSubnets",
                "iam:ListInstanceProfilesForRole",
                "iam:PassRole",
                "ec2:GetPasswordData"
            ],
            "Effect": "Allow",
            "Resource": "*"
        }
    ]
}
If you want to launch agents with an IAM Instance Profile, "iam:PassRole" permission is required.
If you want to launch Windows agents and use the generated Administrator password, the "ec2:GetPasswordData" permission is also required.
Either automatically upon Jenkins post-initialization or through Jenkins script console, example:
import com.amazonaws.services.ec2.model.InstanceType
import com.cloudbees.jenkins.plugins.awscredentials.AWSCredentialsImpl
import com.cloudbees.plugins.credentials.*
import com.cloudbees.plugins.credentials.domains.Domain
import hudson.model.*
import hudson.plugins.ec2.AmazonEC2Cloud
import hudson.plugins.ec2.AMITypeData
import hudson.plugins.ec2.EC2Tag
import hudson.plugins.ec2.SlaveTemplate
import hudson.plugins.ec2.SpotConfiguration
import hudson.plugins.ec2.UnixData
import jenkins.model.Jenkins
import hudson.plugins.ec2.HostKeyVerificationStrategyEnum
import hudson.plugins.ec2.ConnectionStrategy
import hudson.plugins.ec2.Tenancy
import hudson.plugins.ec2.EbsEncryptRootVolume

def sshPortToConnectWith = '22'

// store parameters
def slaveTemplateUsEast1Parameters = [
  ami:                           'ami-AAAAAAAA',
  associatePublicIp:             false,
  spotConfig:                    null,
  connectBySSHProcess:           false,
  connectUsingPublicIp:          false,
  customDeviceMapping:           '',
  deleteRootOnTermination:       true,
  description:                   'Jenkins agent EC2 US East 1',
  ebsOptimized:                  true,
  iamInstanceProfile:            '',
  idleTerminationMinutes:        '5',
  initScript:                    '',
  instanceCapStr:                '2',
  javaPath:                      'java',
  jvmopts:                       '',
  labelString:                   'aws.ec2.us.east.jenkins.worker',
  launchTimeoutStr:              '',
  numExecutors:                  '1',
  unixData:                      new UnixData(null, null, null, sshPortToConnectWith, null),
  remoteFS:                      '',
  remoteAdmin:                   'ec2-user',
  tmpDir:                        '',
  securityGroups:                'sg-11111111',
  stopOnTerminate:               false,
  subnetId:                      'subnet-SSSSSSSS',
  tags:                          new EC2Tag('Name', 'jenkins-worker'),
  type:                          't2.medium',
  useDedicatedTenancy:           false,
  useEphemeralDevices:           false,
  usePrivateDnsName:             false,
  userData:                      '',
  zone:                          '',
  metadataSupported:             true,
  metadataEndpointEnabled:       true,
  metadataTokensRequired:        true, // `true` enforces IMDSv2 only (over IMDSv1), an important AWS security best practice
  metadataHopsLimit:             1,
  minimumNumberOfInstances:      0,
  minimumNumberOfSpareInstances: 0,
  maxTotalUses:                  -1,
  monitoring:                    false,
  t2Unlimited:                   false,
  connectionStrategy:            ConnectionStrategy.valueOf('PRIVATE_IP'),
  hostKeyVerificationStrategy:   HostKeyVerificationStrategyEnum.valueOf('CHECK_NEW_HARD'),
  tenancy:                       Tenancy.valueOf('Default'),
  ebsEncryptRootVolume:          EbsEncryptRootVolume.valueOf('ENCRYPTED'),
  nodeProperties:                null
]

def AmazonEC2CloudParameters = [
  name:      'MyCompany',
  credentialsId:  'jenkins-aws-key',
  instanceCapStr: '2',
  privateKey:     '''-----BEGIN RSA PRIVATE KEY-----
MIIEogIBAAKCAQEAkjaolzS/3wlfDfQkaXyuBQ5VaodY9/0tm8BUdcfGmv7MQLUg
G12MNC5MLcR0Oj4NIOJZEZvH3afPmk5UZ1hZWRWupokSXDM3alNFoWzt0SKDTsig
nHrqouojRbTqZG8dlmAOHom3mTzj3OFG7PyLdsAEOcrVXwnqgBn7mDriXz+dLkFY
QctsJHXpm3XBNVaZ/Rmx7vAwFSg3XO0DkjRjR2mXadyh4yQX/bMqr1VEAYBBjGtZ
ri9OXAnoBMduNndeRTQ6i4xA2mBW7zcg4qksHUd+0jKN5t8cVxqOSOcCCztgwaXh
xEa9/SMIS+FR6NOrUQ+w0MxWsspHogWNWif9IQIDAQABAoIBAGLt9r5wY46OsbEo
SubRBJHJNAQjVhBdTtm+lacnp/rBggQaSYIalr3LwaGJ9jZeO9XPMQLYC7CvVamL
bFKMlc/P+t8VicW2pb0cYNWrdXH2zy+kUf/urwnSMFF+6sVP5Y4UqhkBh6d4apjO
GIZLDjYoD/PmiN6IQBGzAufql7ZntgUohYYkHM/ovskZSR6fSKXn91sirlmisfhE
/74kGfJF2+S/+HYtpcCgYkSYs/c0Ibzw8wEnNaCK+I0zn4Ppp53ip3hOiI3+0EVY
qnNisqL5yj8wjj1QFfwkVyWCtr7p0U4A4aDza35rxDKpZW/PcZNRK5pbLQzriqo5
J9DOQJ0CgYEA2HGwf+GjRMoJCcONjHKP8NJ3KoSBFj0ujJAxhIOyxJveMMS5agCH
94yNReZEppV7C/1fpcPb9GL38tfAb6VdGHOlFmq7djgkCKH+F7/PvDJ+u+1G871K
YtvEFlHT6IPUouEfSj+7/eRxZwNEuKkM2x4dOqPXbvKU63HJkxRFdz8CgYEArO89
WARI2+o82V3ldPEZAIfri+4HD0nYW7UY4hbExdyuYTKL619Wt1nr91ubCnpR5/1s
xfesBGYHlqsAuHi4tXCaU9aDyK9j+MnWUkDMvG5RXWzLDmrrfmFlohHc6r7HuVuR
gtVayj8izcZpXew6Vo3ENRdvfxCzT2V7OPnG058CgYAOb465CMCN7vepWgyPyHhH
NJJUGKBPbmczYs6aqvn6WPb5w7UmF8D5xrsJZXFAtwmM5CpD8QszgoJNBQzFpX7P
Ca+CDj5QhTAKD1vWE6n0QF3phMrNqNtUOpoabvy2Lky5TFB88EFGjrzthO9JbaT4
3EpQxeqxcKZ0CZPLJnf3mwKBgFu46IhufVZm/q8rpjBIUEJ/1Ob68LOjLyY0/2Wr
PeLUEYlsDdphTtUg1I71/12nUxoAyFiX7JzIoO3A9TjijtVtS+17sZoXrKagJxSp
We33dSBgO7MB8rWtYwJ7BvlbBwPBFYSXNPhgVE1gFzLBwI930cF3FKQIb5KE+L5X
fKVxAoGAcvNM9HpgtR3ngP7xWkeOWVkV6NDc2GbuYptbAMM7lY2DzG2Dbq1ru6iJ
n5CNoNomPrHA05Zx2e+DbmrDbJVowSlX5xJKbc3ttYsBZlqYdZmWllpG1np8snwd
I2vmggm6Uubt0s433SbMwgXonolPH0N7s8VdzVf0/moMUujYcE0=
-----END RSA PRIVATE KEY-----''',
  region: 'us-east-1',
  useInstanceProfileForCredentials: false
]

def AWSCredentialsImplParameters = [
  id:           'jenkins-aws-key',
  description:  'Jenkins AWS IAM key',
  accessKey:    '01234567890123456789',
  secretKey:    '01345645657987987987987987987987987987'
]

// https://github.com/jenkinsci/aws-credentials-plugin/blob/aws-credentials-1.23/src/main/java/com/cloudbees/jenkins/plugins/awscredentials/AWSCredentialsImpl.java
AWSCredentialsImpl aWSCredentialsImpl = new AWSCredentialsImpl(
  CredentialsScope.GLOBAL,
  AWSCredentialsImplParameters.id,
  AWSCredentialsImplParameters.accessKey,
  AWSCredentialsImplParameters.secretKey,
  AWSCredentialsImplParameters.description
)

// https://javadoc.jenkins.io/plugin/ec2/hudson/plugins/ec2/SlaveTemplate.html
SlaveTemplate slaveTemplateUsEast1 = new SlaveTemplate(
  slaveTemplateUsEast1Parameters.ami,
  slaveTemplateUsEast1Parameters.zone,
  slaveTemplateUsEast1Parameters.spotConfig,
  slaveTemplateUsEast1Parameters.securityGroups,
  slaveTemplateUsEast1Parameters.remoteFS,
  InstanceType.fromValue(slaveTemplateUsEast1Parameters.type),
  slaveTemplateUsEast1Parameters.ebsOptimized,
  slaveTemplateUsEast1Parameters.labelString,
  Node.Mode.NORMAL,
  slaveTemplateUsEast1Parameters.description,
  slaveTemplateUsEast1Parameters.initScript,
  slaveTemplateUsEast1Parameters.tmpDir,
  slaveTemplateUsEast1Parameters.userData,
  slaveTemplateUsEast1Parameters.numExecutors,
  slaveTemplateUsEast1Parameters.remoteAdmin,
  slaveTemplateUsEast1Parameters.unixData,
  slaveTemplateUsEast1Parameters.javaPath,
  slaveTemplateUsEast1Parameters.jvmopts,
  slaveTemplateUsEast1Parameters.stopOnTerminate,
  slaveTemplateUsEast1Parameters.subnetId,
  [slaveTemplateUsEast1Parameters.tags],
  slaveTemplateUsEast1Parameters.idleTerminationMinutes,
  slaveTemplateUsEast1Parameters.minimumNumberOfInstances,
  slaveTemplateUsEast1Parameters.minimumNumberOfSpareInstances,
  slaveTemplateUsEast1Parameters.instanceCapStr,
  slaveTemplateUsEast1Parameters.iamInstanceProfile,
  slaveTemplateUsEast1Parameters.deleteRootOnTermination,
  slaveTemplateUsEast1Parameters.useEphemeralDevices,
  slaveTemplateUsEast1Parameters.launchTimeoutStr,
  slaveTemplateUsEast1Parameters.associatePublicIp,
  slaveTemplateUsEast1Parameters.customDeviceMapping,
  slaveTemplateUsEast1Parameters.connectBySSHProcess,
  slaveTemplateUsEast1Parameters.monitoring,
  slaveTemplateUsEast1Parameters.t2Unlimited,
  slaveTemplateUsEast1Parameters.connectionStrategy,
  slaveTemplateUsEast1Parameters.maxTotalUses,
  slaveTemplateUsEast1Parameters.nodeProperties,
  slaveTemplateUsEast1Parameters.hostKeyVerificationStrategy,
  slaveTemplateUsEast1Parameters.tenancy,
  slaveTemplateUsEast1Parameters.ebsEncryptRootVolume,
  slaveTemplateUsEast1Parameters.metadataSupported,
  slaveTemplateUsEast1Parameters.metadataEndpointEnabled,
  slaveTemplateUsEast1Parameters.metadataTokensRequired,
  slaveTemplateUsEast1Parameters.metadataHopsLimit,
)

// https://javadoc.jenkins.io/plugin/ec2/index.html?hudson/plugins/ec2/AmazonEC2Cloud.html
AmazonEC2Cloud amazonEC2Cloud = new AmazonEC2Cloud(
  AmazonEC2CloudParameters.name,
  AmazonEC2CloudParameters.useInstanceProfileForCredentials,
  AmazonEC2CloudParameters.credentialsId,
  AmazonEC2CloudParameters.region,
  AmazonEC2CloudParameters.privateKey,
  AmazonEC2CloudParameters.instanceCapStr,
  [slaveTemplateUsEast1],
  '',
  ''
)

// get Jenkins instance
Jenkins jenkins = Jenkins.getInstance()

// get credentials domain
def domain = Domain.global()

// get credentials store
def store = jenkins.getExtensionList('com.cloudbees.plugins.credentials.SystemCredentialsProvider')[0].getStore()

// add credential to store
store.addCredentials(domain, aWSCredentialsImpl)

// add cloud configuration to Jenkins
jenkins.clouds.add(amazonEC2Cloud)

// save current Jenkins state to disk
jenkins.save()
When you set up a template for a Unix instance (Type AMI field), you can select the strategy used to guarantee the instance you're connecting to is the expected one. You should use a strong strategy to guarantee that a man-in-the-middle attack cannot be performed.
You can select your strategy under the Advanced... configuration, on the Host Key Verification Strategy field of every configured AMI.
The plugin provides several strategies because each one has its own requirements. So providing more than one allows administrators to use the one best fits to their environment. These strategies are:
This strategy checks the SSH host key provided by the instance with the key printed out in the instance console during the instance initialization. If the key is not found, the plugin doesn't allow the connection to the instance to guarantee the instance is the right one. If the key is found and it is the same as the one presented by the instance, then it's saved to be used on future connections, so the console is only checked once.
Requirements:
- The AMI used should print the key used. It's a common behaviour, for example the Amazon Linux 2 AMI prints it out. You can consult the AMI documentation to figure it out.
- The launch timeout should be long enough to allow the plugin to check the instance console. With this strategy, the plugin waits for the console to be available, which can take a few minutes. The Launch Timeout in seconds field should have a number to allow that, for example 600 (10 minutes). By default there is no timeout, so it's safe.
The expected format on the instance console is algorithm base64-public-key at the beginning of a line. For example:
ecdsa-sha2-nistp256 AAAAE2VjZHNhLXNoYTItbmlzdHAyNTYAAAAIbmlzdHAyNTYAAABBBNFNGfKpPS/UT2jAEa0+9aZneku2a7TVwN+MjGesm65DDGnXPcM9TM9BsiOE+s4Vo6aCT9L/TVrtDFa0hqbnqc8=
ssh-ed25519 AAAAC3NzaC1lZDI1NTE5AAAAIHm0sVqkjSuaPg8e7zfaKXt3b1hE1tBwFsB18NOWv5ow
ssh-rsa AAAAB3NzaC1yc2EAAAADAQABAAABAQDNTngsAxOCpZwt+IBqJSQ9MU2qVNYzP4D5i1OHfIRXCrnAuJ54GtFzZEZqqo4e1e/JqBQOX3ZPsaegbkzl2uq5FzfFcFoYYXg5gL7htlZ1I2k6/2iIBv7CHAjbpXMkH8WoF2C3vZFRMWLs20ikQpED+9m11VejE19+kqJwLMopyAtq+/mCgiv4nw5QWh3rrrEcbgzuxYoMD0t9daqBq1V0lzRqL36ALVySy7oDjr3YzCN+wMXe1I36kv3lSeCHXnhc53ubrBIsRakWLBndHhPqyyAOMEjdby/O/EQ2PR7vBpH5MaseaJwvRRDPQ6qt4sV8lk0tEt9qbdb1prFRB4W1
Recommended for:
This strategy is the most secure. It's recommended for every instance if you can meet the requirements. We recommend, whenever possible, configuring each AMI with Stop/Disconnect on Idle Timeout to take advantage of the ssh host key cache allowing next connections to be done faster.
This strategy checks the SSH host key provided by the instance with the key printed out in the instance console during the instance initialization. If the key is not found, the plugin allows the connection to the instance in order to guarantee the instance is the right one. If the key is found and it is the same as the one presented by the instance, then it's saved to be used on future connections, so the console is only checked once.
Requirements:
- The AMI used may print the key used to guarantee the instance is the right one, but it's not mandatory.
- The launch timeout should be long enough to allow the plugin to check the instance console. With this strategy, the plugin waits for the console to be available, which can take a few minutes. The Launch Timeout in seconds field should have a number to allow that. For example 600 (10 minutes). By default there is no timeout, so it's safe. If the timeout expires, the connection is not done.
The expected format on the instance console is algorithm base64-public-key at the beginning of a line. For example:
ecdsa-sha2-nistp256 AAAAE2VjZHNhLXNoYTItbmlzdHAyNTYAAAAIbmlzdHAyNTYAAABBBNFNGfKpPS/UT2jAEa0+9aZneku2a7TVwN+MjGesm65DDGnXPcM9TM9BsiOE+s4Vo6aCT9L/TVrtDFa0hqbnqc8=
ssh-ed25519 AAAAC3NzaC1lZDI1NTE5AAAAIHm0sVqkjSuaPg8e7zfaKXt3b1hE1tBwFsB18NOWv5ow
ssh-rsa AAAAB3NzaC1yc2EAAAADAQABAAABAQDNTngsAxOCpZwt+IBqJSQ9MU2qVNYzP4D5i1OHfIRXCrnAuJ54GtFzZEZqqo4e1e/JqBQOX3ZPsaegbkzl2uq5FzfFcFoYYXg5gL7htlZ1I2k6/2iIBv7CHAjbpXMkH8WoF2C3vZFRMWLs20ikQpED+9m11VejE19+kqJwLMopyAtq+/mCgiv4nw5QWh3rrrEcbgzuxYoMD0t9daqBq1V0lzRqL36ALVySy7oDjr3YzCN+wMXe1I36kv3lSeCHXnhc53ubrBIsRakWLBndHhPqyyAOMEjdby/O/EQ2PR7vBpH5MaseaJwvRRDPQ6qt4sV8lk0tEt9qbdb1prFRB4W1
Recommended for:
This strategy is the default one for AMIs created with a former version of the plugin. It doesn't break any connection because the plugin connects to the instance even when the key is not found on the console. The only point to take into account is you need to have the right timeout to allow the plugin to get the instance console. This strategy is recommended when upgrading from a previous version of the plugin. Check New Hard is the safest strategy, so you should consider migrating to it. We recommend, whenever possible, configuring each AMI with Stop/Disconnect on Idle Timeout to take advantage of the ssh host key cache allowing next connections to be done faster.
This strategy doesn't check any key on the console. It accepts the key provided by the instance on the first connection. Then, the key is saved to be used on future connections to detect a Man-in-the-Middle attack (the host key has changed).
Requirements:
- N/A
Recommended for:
This strategy is recommended when your AMIs don't print out the host keys on the console. The Check New Soft cannot be used, but at least, you can catch a man-in-the-middle attack on further connections to the same instance. If the attack was already perpetrated you cannot detect that. Again, the Check New Hard is the safest strategy.
This strategy neither checks any key on the console, nor checks future connections to the same instance with a saved key. It accepts blindly the key provided by the instance on the first and further connections.
Requirements:
- N/A
Recommended for:
This strategy is not recommended because of its lack of security. It is the strategy used for prior versions of the plugin.
The default strategy for every new instance is the Check New Hard one. You can select a strategy per AMI. It's under the Advanced... configuration, on the Host Key Verification Strategy field.
You may upgrade from a Jenkins installation with a former plugin version without this security mechanism. The default strategy for every existing instance is the Check New Soft strategy. This guarantees your jobs are not going to stop working and improves the situation. We recommend, if possible, upgrading to the Check New Hard strategy to be safer against a Man in the Middle attack.
When you configure a template for a Windows instance (Type AMI field), you can use HTTPS and disallow self-signed certificates. This guarantees the instance you're connecting to is the expected one and a man-in-the-middle attack cannot be performed.
Before securely connecting to the instance, you need to 1) configure the AMI, 2)install the certificate, 3) configure WinRM properly and 4) set the firewall rules to allow the connection. You can find some guidance at the AMI Type field help, under the template configuration on your Jenkins instance.
Tips:
- When the
Allow Self Signed Certificatefield is checked, the plugin allows self-signed certificates. It means that the plugin neither checks the CA which issued the certificate, nor verifies the host it is connecting to is present on the certificate. If the field is not checked, this kind of certificates are not allowed and both verifications are performed. - The EC2 plugin connects to the instance using either an IP address. It does not use the DNS name. You must configure WinRM with a certificate which includes the IP of the instance. Something like:
#3: ObjectId: 2.5.29.17 Criticality=false
SubjectAlternativeName [
  DNSName: myhostname.com
  IPAddress: 111.222.333.444  <--------------
]
If you have issues with authentication timing out as a node is starting (see the stack traces in JENKINS-30284) you can use these System Properties to adjust the number of tries and timeout values:
jenkins.ec2.bootstrapAuthSleepMs (default 30000)
jenkins.ec2.bootstrapAuthTries (default 30)
If you are using a Amazon Linux AMI and encounter exceptions like java.io.FileNotFoundException: /usr/lib/jvm/java-1.8.0-openjdk-1.8.0.201.b09-0.amzn2.x86_64/jre/lib/currency.data (No such file or directory) or Remote call on EC2 [...] failed then chances are that the Amazon Linux is doing some security upgrades in the background and causes the agent to be in an invalid state.
Another symptom of the same problem if you run Docker on your agents can be either docker containers randomly exiting with ExitCode 137 or getting error messages with "EOF" part way through trying to pull or run images - this can occur if there is a security patch for Docker itself because applying this update stops Docker. These upgrades are asynchronous on Amazon Linux 2 (whereas on the older Amazon Linux the docs stated that the SSH service was not started until they complete) so your Jenkins job may have already started using Docker, causing this issue.
From the documentation of the Amazon Linux it's stated:
Amazon Linux is configured to download and install security updates at launch time.[...] The default setting for repo_upgrade is security. That is, if you don't specify a different value in your user data, by default, Amazon Linux performs the security upgrades at launch for any packages installed at that time
You can check by looking for repo_upgrade: in "cloud-init" settings /etc/cloud/cloud.cfg.
This issue can be solved in different ways:
-
Rebuild your AMI so the latest security fixes are baked in => this will mean however that the issue could eventually come back if further patches are published.
-
Update the Jenkins config for launching your AMI, so it disables automatic installation of security fixes (see amazon documentation) by adding the following in 'User Data' under 'Advanced' for the AMI in Jenkins Clouds config:
#cloud-config repo_upgrade: none -
If you disable repo_upgrade per the previous point, you can optionally still ensure patches are applied by adding your own yum command in the 'Init script' for the AMI in Jenkins Clouds config, the advantage being that Jenkins will not start using the agent until this init script has finished

If you updated to 1.50.2, or 1.49.2 or 1.46.3 and you need to downgrade back to the previous version, be sure to remove the file JENKINS_HOME/ec2.xml before doing that. This file is created if you click on the button Dismiss these messages of the monitor that warns you when there are some template with a weak strategy. If you don't do that, Jenkins will start and will overwrite its config.xml file losing your cloud configuration.
At this moment, it seems related with a race-condition between the plugin and the OldDataMonitor class of Jenkins Core. See https://issues.jenkins-ci.org/browse/JENKINS-62231
Newer changelogs are posted here, 1.45 and older releases can be found here