This plugin integrates Jenkins users with Selenium Testing and Screenshot Testing on CrossBrowserTesting.com. CrossBrowserTesting.com provides cross browser testing of websites, webpages, and web applications on Windows, Macs, and real iPhones, iPads, and Android Phones and Tablets.
Plugin Information |
|---|
View CrossBrowserTesting.com on the plugin site for more information. |
Features
- Running Selenium Scripts on CrossBrowserTesting.com
- Running Automated Screenshot Testing on CrossBrowserTesting.com
- Automated Starting and Stopping of the CrossBrowserTesting.com NodeJS local tunnel to test local and development webpages behind your firewall (embedded and locally installed)
- Use named local tunnels
- Enable Test Views with links to download Screenshots for Screenshot Tests, and view videos and packet captures for Selenium scripts
- Use different API Credentials for each build
- Embedded local tunnels
- Supports Jenkins Pipeline
- Use login profiles or selenium scripts for Automated Screenshot Testing
Installation
via the interface
- Go to your installation's management screen.
- Click Manage Plugins.
- Click the Available tab.
- Find the CrossBrowserTesting.com Plugin and select the checkbox.
- then click either Install without restart or Download now and install after restart.
by hand(not recommended)
- Download CrossBrowserTesting.hpi.
- Save the downloaded .hpi file into your `$JENKINS_HOME/plugins` directory.
- Restart Jenkins.
Configuration
Environment Variables
The CrossBrowserTesting.com Jenkins Plugin passes your build step information to your Selenium scripts as environment variables. The exact syntax will vary depending on your scripting language.
Variable | Description |
CBT_USERNAME | the username used on CrossBrowserTesting.com for Selenium Testing |
CBT_AUTHKEY | the apikey used on CrossBrowserTesting.com for Selenium Testing |
CBT_BUILD_NAME | the Jenkins Project's name |
CBT_BUILD_NUMBER | the Jenkins Project's current build number |
CBT_OPERATING_SYSTEM | the apiname of the selected Operating System |
CBT_BROWSER | the apiname of the selected Browser |
CBT_RESOLUTION | the name of the selected Screen Resolution |
CBT_BROWSERNAME | the browser name without the version (only needed for Javascript Selenium Tests) |
CBT_BROWSERS | an array of JSON objects containing the "operating_system", "browser", "resolution, and "browserName" of each configuration specified |
See the examples directory for a few language specific sample scripts.
Saving Your CrossBrowserTesting.com API Credentials
- Go to your installation's management screen.
- Click Configure System.
- Find the section labeled CrossBrowserTesting.com.
- Click Add
- Select Jenkins as the "Jenkins Credentials Provider"
- Select Crossbrowsertesting.com as the "Kind"
- Enter your CrossBrowserTesting.com Username and API Key information. You can find your api key here (must be logged in)
- Test the credentials using the Test Credentials button
- Click Add.
- Select the credentials on the "configuration page"
- Optional: You can also create and select credentials for each build within the build configuration page.
Build/Configure
Enable Selenium and Screenshot Views
- In the CrossBrowserTesting.com Build Environment, Select "Enable Test Results Pages"
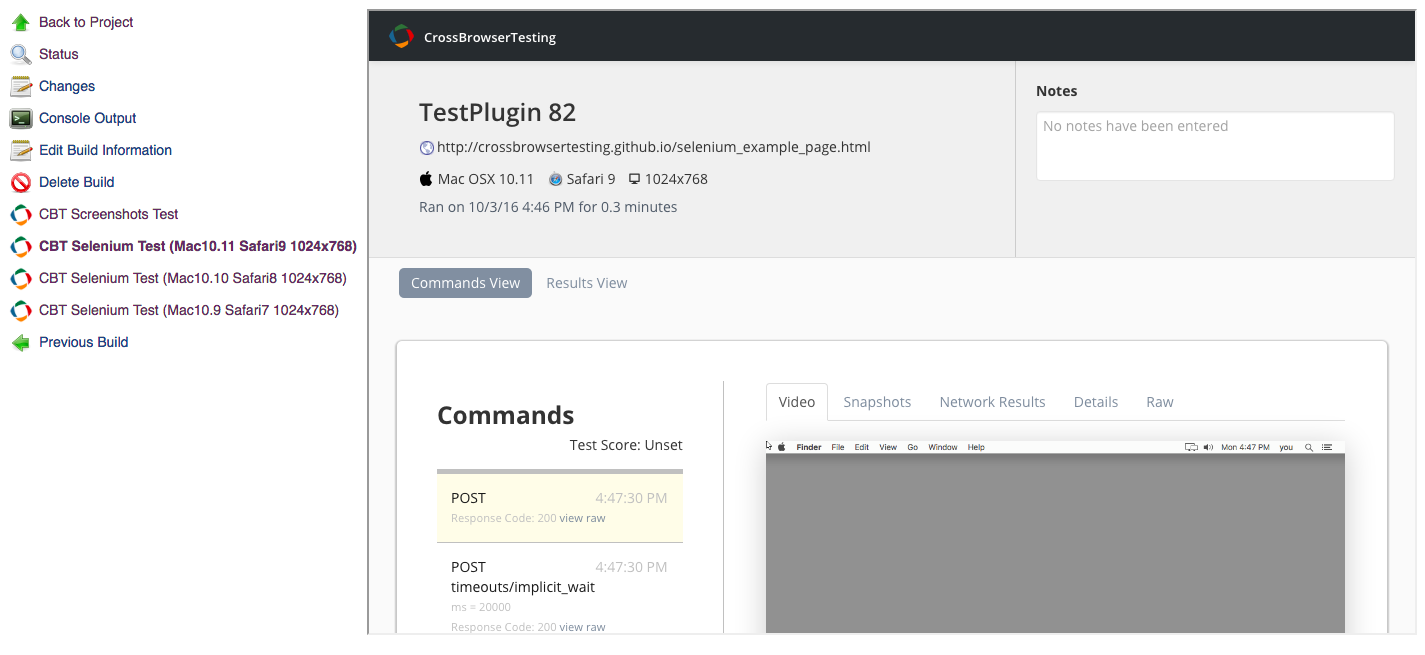
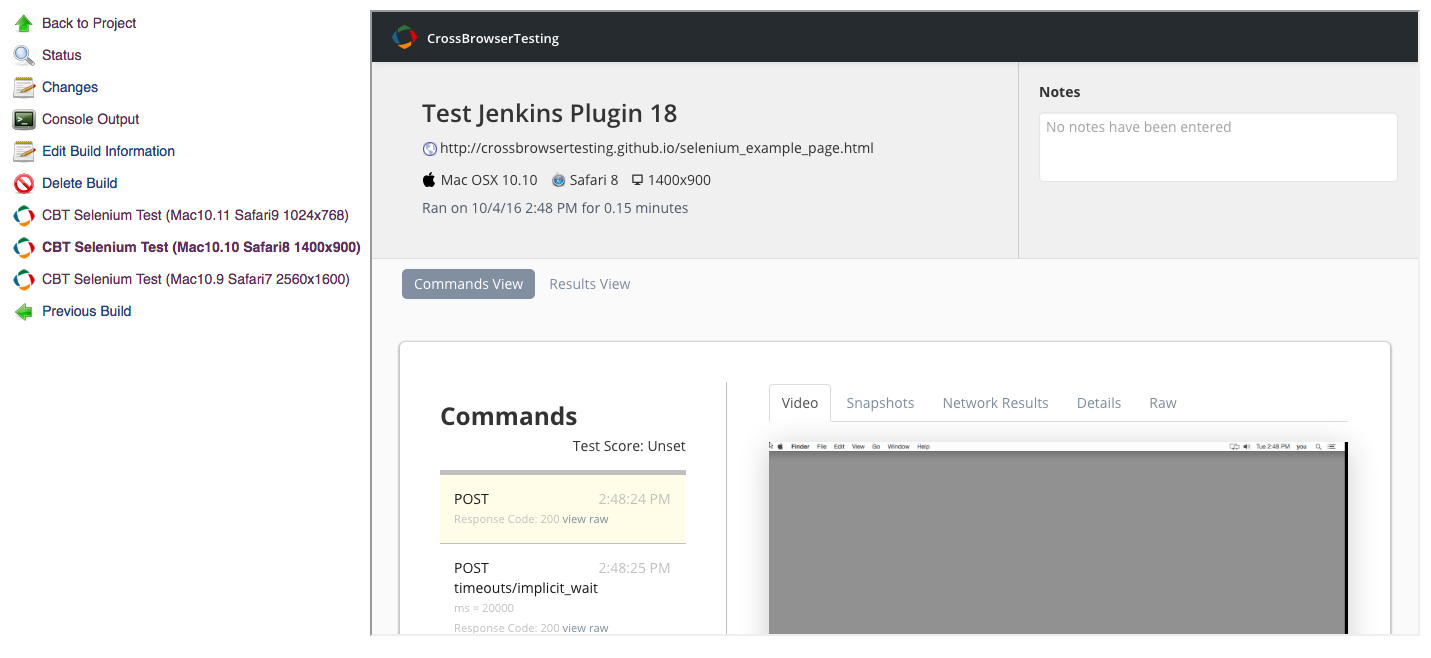
- During your build, links on your sidebar will populate and allow you to interact with the test.
- You can view and download screenshots for a Screenshots Test
- You can view videos, snapshots, and network packet captures for Selenium Tests
Build Environment
- Configure your Jenkins Project.
- In Build Environment, Check the box next to CrossBrowserTesting.com
- For Screenshot Tests: Pick a BrowserList and enter a URL (you must have you API credentials saved for the browserlist to populate). You can add multiple Screenshots Tests by clicking "Add a Screenshots Test"
- For Selenium Tests: Add the Operating System, Browser, and Screen Resolution that you want to run a Selenium Test on. You can add multiple configurations by clicking "Add a Selenium Tests"
- Optional: Check Use Local Tunnel to run tests on webpages behind your firewall. The CBT NodeJS Tunnel is embedded into the plugin and does not need to be install on the Jenkins Server.
- To use a named tunnel, enter the "Tunnel Name" in the advanced section.
- If you prefer not to use the embedded local tunnel and want to use the local tunnel installed on your system, you can specify the path to the local tunnel binary in the advanced section.
- For CBT Credentials: Select the credentials to run the tests with.
Execute a Selenium Test
- Execute a Selenium Test just as normally would with Jenkins.
- For example, if you were running a script written in python on a Unix machine, within the Build section, select Add Build Step and Execute Shell (if you have the Python Plugin installed you can use it instead).
- Enter the command to run your script ie. "python your_selenium_script.py"
- Click Save
- Click Build Now to build the project. Output from the tests will be displayed in Console Output for the build.
Pipeline Configuration
As of version 2.3, the plugin supports Jenkins Pipeline. Here's an example of a pipeline script:
cbt(credentialsId: 'your_credential_id', useLocalTunnel: true, useTestResults: true) {
    cbtScreenshotsTest browserList: 'Your BrowserList', url: 'http://yourawesomewebsite.com'
    cbtSeleniumTest(browser: 'Safari10', operatingSystem: 'Mac10.12', resolution: '1024x768') {
        sh 'python your_selenium_script.py'
    }
}